Glad to hear my readers like my first post on vintage quilts. I received many great comments both here and on facebook. I have been acquiring a fabulous arsenal of tricks to use on these interesting pieces of history. But this quilt you are going to see today, will surely amaze you!
This was also sent to me by
Julie. She told me that she got this 90" double wedding ring quilt top on ebay. It was made by an elderly woman, who was probably 90, from Texas. It is mostly made by hand, but there are some machined seams too. Please realize that as I describe the top and it's issues, it is not to be critical, but rather to instruct quilters on how to deal with such issues.
And the issues on this one are definitely many...
Although it does lay relatively flat (in contrast to some quilts where borders can have either too much fabric and wave like a flag, or too little fabric making the center of the quilt seem like a parachute), it has many problems with very loose seams, poor pressing (if at all), non-smooth curves, ill-tension on the machine stitched sections, fraying patches, holes, etc. The list is extensive.

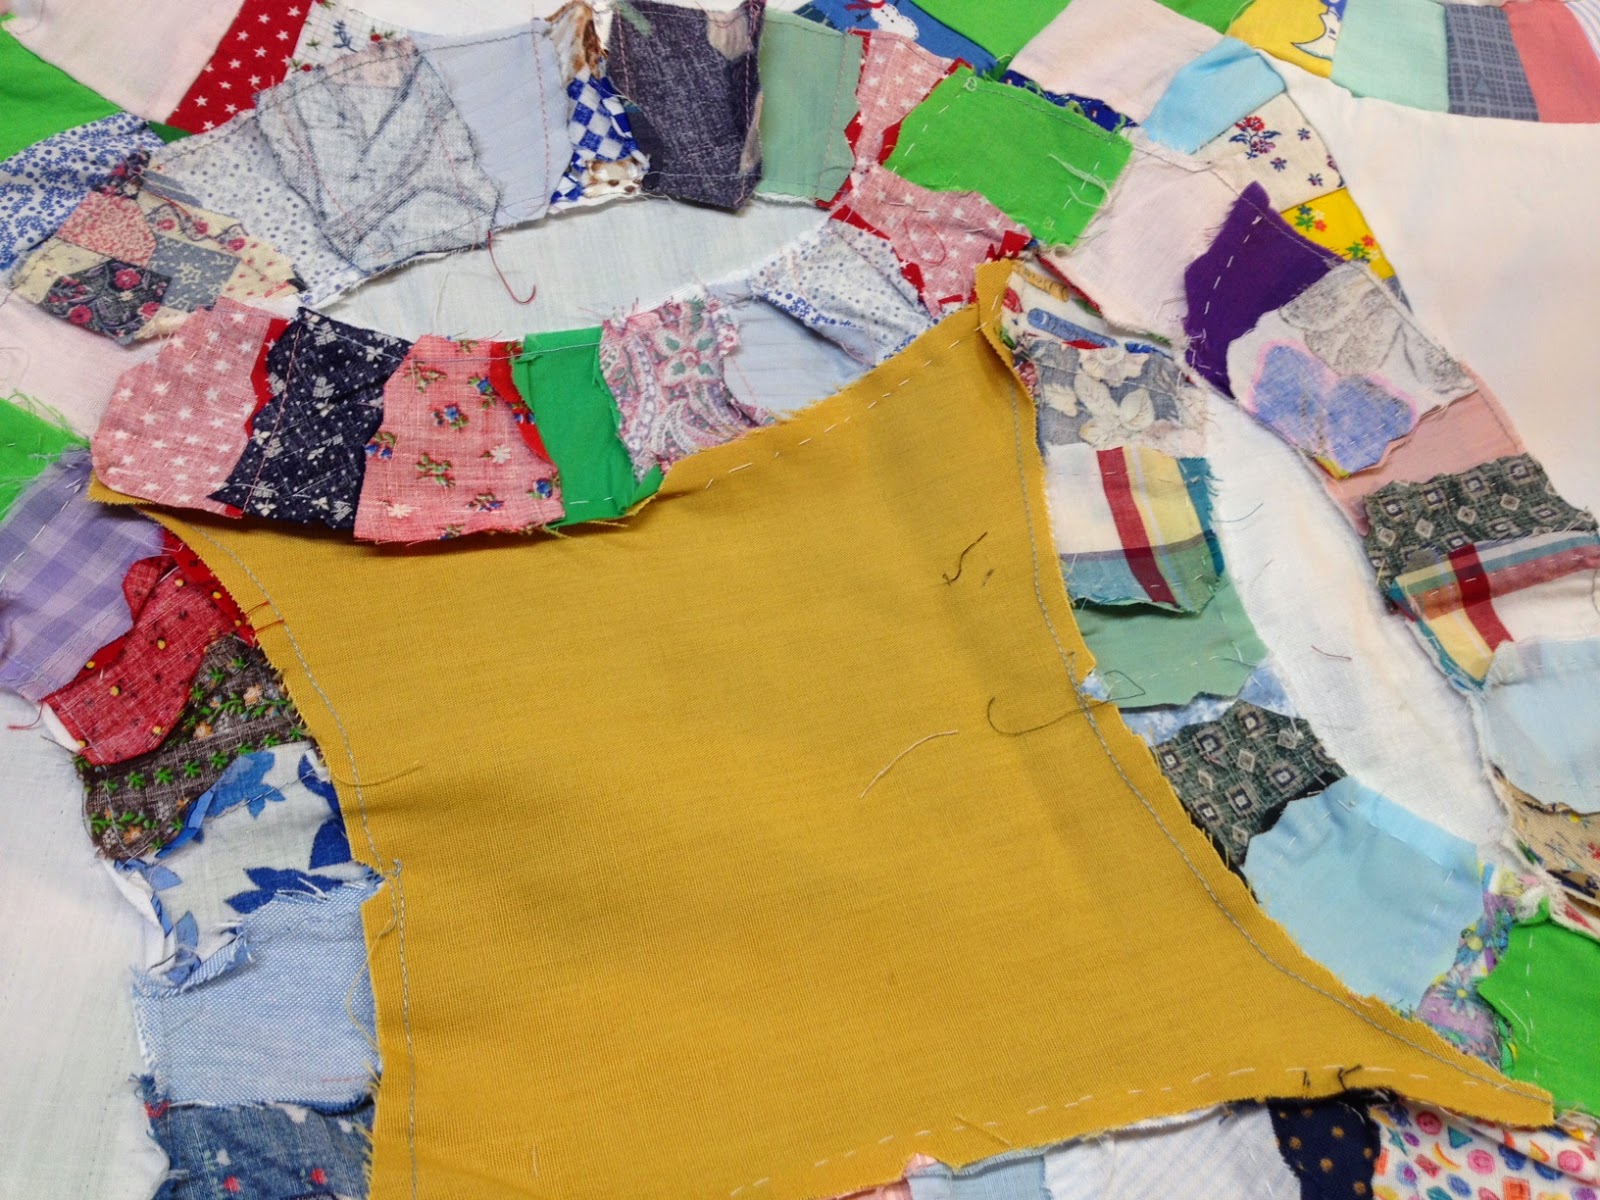
As you see below, there are ALL kinds of fabric. I saw several generic calicos, solid cottons, chambray like you'd have in an Oxford shirt, and even some home-dec weight, and the one I show below that must've come from a very sheer shirt. The tremendous variety is typical of this type quilt, as well as typical of what would have been used 75+ yrs ago (but I have no indication that this was made in the past, just made by an older woman). The varying weights of fabric, however, do make proper tensioning more challenging because every weight behaves a little differently. Given all of the big issues, though, this is low on my list of concerns as I begin the project.

From the front... There are several different white fabrics used on the tear-drop shapes. Some are heavy enough to cover the shadow-through of the more colorful wedges, but most are not. Given the insecure stitches, trimming away the extra fabric seemed riky. I will discuss how this could have been handled on Julie's end prior to sending me the quilt at the end.
The wedges used in the pieced rings were clearly not all cut from a similar sized template. Many of them have a large flap of fabric at the seam which half a fingernail fits underneath. Or a hopping foot catches beneath...
The 4-patches where the rings come together tell the tale of the elderly quilter and her failing eye-sight and dexterity. The patches often have a pull to them, indicating that the adjoining pieces were almost forced to fit. I had to deal with both pulling stitches, as well as gaping holes at the centers on some.
The location where the largest squares have those acute points often had fraying ends. These are challenging for a good quilter, but when pieces aren't cut identically, it is obviously hard to get everything to fit together. When I got to areas like this, all I could do was stitch over them as best I can to keep it from further fraying. When the quilt goes home, I will encourage Julie to get a bottle of No-Fray and generously dot these fraying areas.
one other idea, too, for the holes at the center of these 4-patches, is to hand stitch small fabric circles onto them to cover the area.
Places/curves like what I show above are hard to make lay smooth, but are fairly common when not enough stitches are taken, and when the curvature of the white patch doesn't quite match that of the ring.
So now that you have seen what I received to work with, let's talk about what was done to save this quilt. We have talked about using muslin liners to even out colorations of thin fabrics, and to cover areas that have gaping holes. And trust me, I considered it here. The reason I ditched the idea is this. I had to quilt this as a full float on account of its curved edges, I knew that because of its issues I would be manipulating it a TON. I really just didn't want to have an additional piece of material to be messing with or potentially be creating pleats/tucks in. If the quilt is in great shape, but just thin, then the liner is an easy addition. This was anything but.
The other thing I tossed around was what batting to use. Initially, before I had the quilt in hand, I told Julie we'd likely use a thicker or even a double batting to help take up excess fullness. The truth is, though, there isn't much excess fullness. The quilt has very localized pouf areas because of cruddy piecing. These are predominantly from tucks and pleats though. I did test the theory though before completely ruling the 2nd batt out. I layed a piece of cotton and wool (similar in puff to the polyester I would have chosen, since I needed a white batting not natural), and compared how the quilt looked to having just the cotton/poly batting. The additional batting caused the weak stitches to all show that much more. It looked worse, and the messiness at every pleat was still evident. So, I ditched the 2nd batt idea.
The quilting...What I new was that this quilt would need every tear-drop and square block outline stitched, but not in the traditional "stitch in the ditch" manner. I had to "top stitch" these areas in a manner that secures each of these seams. This type of quilting goes against every grain of my training and practice. Your brain as a quilter learns where to hold the template to hit the ditch, NOT the top side! The other thing with top stitching is that the thread shows everywhere, and I had patches of every conceivable color!...Oh bother. No problem, though, I chose the Madiera Monolon. Most of these patches were either white or light. This thread only shows a little when the fabric color is dark. Life goes on, I told myself, so what if it shows a little on the dark green, red and purple. So what. There were larger issues to deal with. This would work. This would work (repeated like the Little Train that Could said).

Row by row, I went, ditching away, securing this quilt back together. Many of the loose stitches were showing through the seams, but that is something that Julie can remove later if it is offensive. It is clearly looking better with just a small amount of stitching. I chose a stencil for the large patches that was pretty, not overly complicated and fit the space perfectly. Initially I thought I might echo around these to make the motifs pop, but this was abandoned after realizing how many colors it would involve. It would have had a great effect for the puffier batting, but was sort of a mute point on this thinner cotton. In the white tear-drop shapes, I free-hand quilted feathers. My goal with the quilting was to hopefully draw the viewer's eye away from the rings, where most of the problems were. I should also note that all of this quilting of feathers and stencils is also with the nylon thread. If it is good enough for Harriet Hargrave, it is good enough for me.
One area that I found to be a nuisance was the white squares. Now, I marked the stencil on the colored patches using my miracle chalk. It is fast, and effective. For the first few rows of these that had white patches, I drew through the stencil with a purple air erasable pen. The stencil is rough on these pens, and I hate to destroy my tools just using them. I learned early on that some of the solid fabrics on this quilt were NOT colorfast, so I couldn't use the blue water erasable pens.
Eventually, I decided I would try something. I wondered if I marked a white block with the miracle chalk (please note that I have learned that this product should NOT be used on silk as it react with it and leaves a permanent gray line - a Karen McTavish tip), would I be able to see the chalk with my UV machine lights. I turned off all studio lights and gave it a try. I was faint, but hot-diggity-dog, it was there! Talk about a slick finding!
Here's a peek at one row, on the machine. Just the ditching and the blank spaces is quilted. I was shocked., as the quilt was coming together. No pun on words intended.
I did all of the quilting on the rings last. I hoped to do it in a bright color like the apple-green of the central 4-patches. Julie's chosen background, though, had deep tones, with a muted gray background tone. The green bobbin showed like a sore thumb. Worse yet, I knew that I would be snaking here and there to keep the stitching as continuous as possible. Plus, there were areas of the rings needing additional quilting to secure them, so I wanted my movements to be as non-visible from the back as possible. Bright green was out, and I was bummed. I chose a SoFine in a green-gray tone. In all honesty, it's not the prettiest of muddy colors, BUT it doesn't show on the back, and it does blend pretty well on all of the colored patches of the rings.
My goal for the quilting on the rings was this. Number 1: do necessary repairs, Number 2: attempt to lay down as many of the offending flaps of fabric as possible, Number 3: leave some relief (aka don't just mash down the rings with quilting). My first thought was just doing two parallel arcs down the center of each ring. I think that this would have been attractive, but I'd have pulled my hair out for the number of times I would have caught the hopping foot under the flaps of extra fabric. Since using templates is already a 2-handed job, I would need a 3rd hand to manage the flaps. I, therefore, resorted to a free-hand design that was simple enough that I could use one hand to assist the fabrics, and one to drive the machine.

The loops are simple, but they conceal a lot. That is a good thing. Leaves are placed in the 4-patches. When I stitch these, I stitch as much over the seam as I can to give it extra security. I think that these would look so sweet with either a small button at the center or a small fabric dot. Ideas...
Looking down the row, I love how it is coming together. Sure there are areas of imperfection, but I see those on all quilts. This is about real life. I hope I can still hand-piece tops like this when I am 90 (and evoke feelings of fear and pride into my young whipper-snapper quilter too!).
The finished quilt is a gem. I hope Julie fully appreciates the process to take it from the initial pictures I showed to here. It is definitely time-consuming, but it's gorgeous finished. My plan to move the eye around has worked. It holds many of the traditional-type motifs, despite being a modern-day creation.
One more look...

Now, in the beginning, I alluded to a discussion about what could have been done before sending this to make it better. This is a list of thoughts that has come at me as I have worked it, so please don't think that I held out, or avoided doing what I could have done myself. Every vintage quilt is a learning process, and this one was like a year of college. In hindsight, Julie should have taken the quilt and top stitched (1/16" from the seam line) every tear-drop and every large square, with a clear thread or matching thread. After that, she could have trimmed every seam so that there was no shadow-through. A good bit of repair could have likely been done to the 4-patches, but at the very least seams tightened up, maybe place fusible underneath the center where the hole wants to show. Lastly, just top stitching every seam of the patches on the rings would have contained the pleats, making more decorative quilting possible. It would of course maintain the integrity of the quilt too. With these things done, I would have used a liner to even out the colors of thin fabrics, and likely a puffier batt too, so that the stenciled motifs could be echoed to pop more vividly. Hindsight is the thread that binds our quilting lives into connected moments of insanity! I am pleased with the transformation that was made on this quilt, but these are just thoughts on how it could have been improved upon. Maybe they are lessons you can use when you quilt a vintage masterpiece.


12 comments:
What a happy ending!
Thank you for sharing your thoughts and process - I do like the button idea!
Thanks, too for the suggestions pre-quilting. Good useful information!!!
Thanks, Margaret!!!!!!!!
Thanks so much for all the detail information. It was a free class! The quilt turned out great. I like the idea of buttons in the 4 patch blocks and I might even add buttons to the center of the stenciled motif. Kudos to Julie for seeing the potential. I don't think I would have given this one a second chance.
You did an amazing job. The quilt maker would be smiling for sure.
Amazing. The initial pictures of the construction of the quilt blew me away...I thought it was an impossible task. It is just incredible how beautiful the quilt turned out!
What a transformation!
Thank you so much for explaining the step by step process that you went through to quilt this gem. I love to shop in antique stores and find unfinished tops. I know that some of mine have lots of issues. Just knowing that it is possible to finish them is so helpful!
Wow. That was a huge undertaking and I think it turned out fabulous. Thank you so much again for all the great info. I hope to never need it but one never knows what will come my way.
Wow! What an undertaking and what a beauty it turned out to be! I'm sure Julie will be extremely happy! I have a double wedding ring made by older crafters with similar issues. Long ago I used it and washed it!(being younger and less knowledgeable)now d/t fraying/loosened seams have retired it but still remains a beauty.
WOW. What an amazing transformation! When you showed the pictures of the quilt top as it came to you, I couldn't believe that it was even possible to quilt it successfully. I just had to keep scrolling back and forth between the before and after photos -- it's hard to accept that this is even the same quilt! You did a fantastic job.
No way am I ready to tackle a vintage top like this. But thank you so much for sharing your tips on how to handle it. How wonderful to take someone's pieced top, that would otherwise languish in a closet hidden away, and make it into a functional quilt. :-)
Thanks for all your lessons. It turned out fabulous!
Wow. You saved the day - and the quilt.it was very difficult to see the charm in this quilt top prior to quilting. I would have thought it was hopeless.what a transformation!
Post a Comment