Friday, September 27, 2013

Catching Up...some baby quilts

Kids have been back to school a full month now.  I have been a quilting fool for much of it, trying to make up for the lack of quilting over the summer.  I've done a pretty good job at getting things mostly caught up. Right now, I have a pile of jobs for October that are Christmas (or before) commitments.  It's nice to NOT have these all piled up for the last week of November, for a change!!  BTW, I recently got a great snowflake pantograph, so...if you have any fun holiday/winter quilts that you have been itching to get quilted, you might get in touch with me :-)

Here are a couple baby quilts I finished in the last month.  I have done this quilt before.  It's really sweet for a boy.  The challenge comes in trying to make the quilts not identical (since they are going to the same owner).
 I love how this simple sashing looks on a sampler-type quilt.  It is sweet, and not hard to do.  The backgrounds of all blocks are a quick and flowy freehand feather.  These are bump-back or traditional style feathers, but they move right along and require no marking.
This has just a single cotton batt (Hobbs 80/20) and the thread is probably Omni.  Gosh, can't believe that I forgot that, but I suspect that it is.  Had it been for a girl, it might have been Glide (nice-n-shiny), but I doubt I used shiny thread on a boy's quilt.
The second quilt is a little smaller, and has machine embroidery blocks.  My photos are kind of bad, thanks to the phone.  My good camera just came back from being repaired yesterday.  My son and I had a costly oops while on vacation this summer.  I'll be glad to have it home again.
 This was a rush job, so the designs are on the simpler side.  It's still pretty though.
 I love how simple geometric patterns can have a beautiful look.  The double CCs are perfect for the 9-patch blocks.
 Lastly, I will leave you with a sneak peek at something I am puttering around.  It is all made with Cherrywoods.  If I ever get rich, that is one of the first things I will stock up on!  It's kind of a play on improvisational piecing, use of color and whimsy.

Saturday, September 21, 2013

Exciting Week

This weekend, there are a couple of big quilt shows running - The Georgia Quilt Show and the Pennsylvania National Quilt Extravaganza (hosted by Mancuso).  I have entered the GA show four years now, and ribboned each year.  Each year the competition is a bit stiffer too.  Last year the top prize was a huge chunk of change, so it attracted some larger name quilters.  I wasn't really sure what this year would bring, but sent 2 of my better quilts anyhow.  Zen Garden had a bit of a unpredictable start last year, bringing home more than a handful of honorable mentions.  It was really hard to gauge how it was doing.  At the start of this year, it earned yet two more honorable mentions.  One of them was at Paducah, which I consider a definite win.  This set of somewhat lackluster results was tempered by the fact that it was the cover quilt for the Vermont Quilt Festival's class catalog, and it was the cover for MQU magazine's June/July edition!  But until June, I had no idea what to expect.  Since then, it has taken two 1sts and two Best of Shows, including the first it got in Georgia.  A 1st at Georgia pays like a BOS at many other shows - yes, it was a lucrative win!  The comments from my peeps at the show have been all positive, and you can see from the show photo, she is hanging beautifully.
I also sent Kaleidoscopic Calamity to Georgia.  It is a hard size quilt for many shows, being only 35" square. It's difficult to compete with other good small quilts when they are 50".  I made it especially for some of the machine quilting shows that have a 40" and under category, and as you can see it does have no shortage of nice machine quilting!  It didn't place, but it is taking home a special Staff Recognition ribbon.  Both of these are heading to PIQF in Santa Clara next month.  I am hoping for good results there!
I sent two other quilts to Phili for the PNQE - Rainbow Nouveau and Meet Me at Giverny.  Both of these have done pretty well at shows, especially Rainbow Nouveau.  A year ago when this quilt went to its first show, I never would have predicted how well it would do.  In fact, the Georgia Quilt Show selected my Rainbow Nouveau to be on all of their show advertising this year!  Below, it is on the cover of their class catalog (Best of Show relegated to the back inside cover...).  
And last night I was looking at the show's photos uploaded to Facebook, and noticed that they have these banners around the show - one here at a giveaway and another in the entry hallway.  The quilt on the banner is mine!!  Love it!  Now I am completely kicking myself for not attending this show.  I came SO close to going.  Regrets, damn.  Anyhow, Both quilts at PNQE did not disappoint.  Rainbow Nouveau took home a 2nd place in the traditional category, while Giverny got the HM (same category).  I'm scurrying to finish up my applique quilt so I can go shopping for fabric for a new quilt...yup, the winnings are going to burn a hole in my pocket soon!
 I will leave you with a sneak peek of a quilt I am finishing up for next year.  Never fear, it's only the back. You'll have to wait until the springtime to see the grand reveal of the front.  I'm glad that this is done, but will be happier when it's blocked and bound and ready to enter.
Next week's agenda...get some borders onto a small-ish modern quilt I will also hopefully have ready for next season, quilt Erin's silk quilt and a couple others of her's, and finish an article I have due soon.  Sounds easy enough, but it's not!  Too little time...

Wednesday, September 11, 2013

Embroidered Applique Beauty

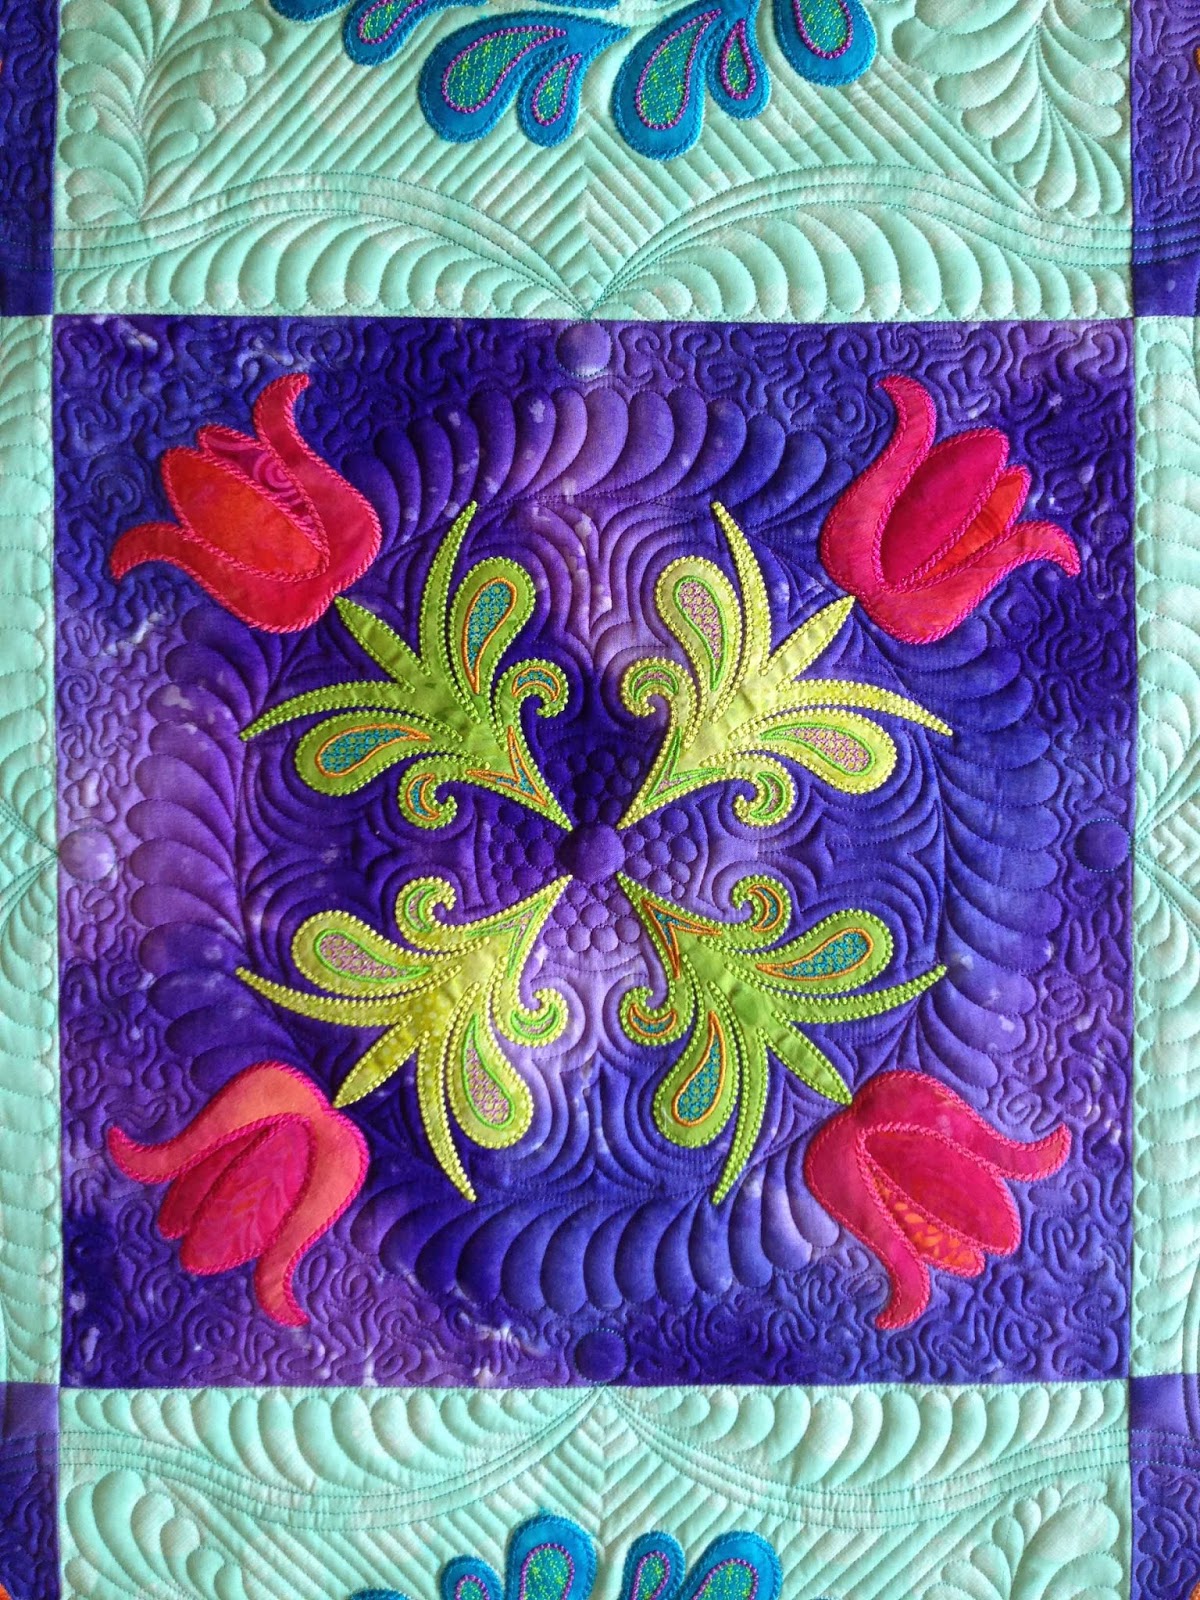
This lovely 54" embroidered applique quilt came off the frame today.  I expected to have finished it yesterday, but sometimes these things have a mind of their own.  I turned out fabulously gorgeous, and I am loving it so much.
 I have been trying my best to make a productive afternoon of things, but the wasteful and mind-sucking sitting around waiting for the Houston award announcements to trickle down is making a complete wasteland of my afternoon.  I managed to quilt half of a sample I need for an upcoming magazine article, but turned the machine off because I was too distracted.  I figured I'd get this blog post written as I just putter and wait for the kids to get home.  We are having a rogue 95F day, when all in the last 2 weeks have barely topped 75, so I just cannot get motivated to go snip my gardens or exercise.
This quilt has a single layer of Hobbs wool batting.  The client has requested thinner threads, not wanting to see the buildup of thread.   I used Madiera Monolon to outline the embroideries.  I just don't get why so many quilters turn their nose up at using clear thread.  That crap just runs in any direction, and never quits.  It is EASY!  Digressing... The detail quilting of the center frame and the curved cross-hatching on the sides of the quilt are done with a 40wt Glide.  This is probably heavier than she had in mind, but I wanted these areas to show, and I chose a teal thread that would show on both the aqua and on the purple.  The look of it showing on one and disappearing on the other is not what I wanted.  I also made that central frame with triple parallel lines, so it was prominent.  The fill for the aqua sections is a pale aqua Bottomline (60wt), while the purple areas were done in a matching purple Invisifil (100wt).  Yes, I know they are different weights, but I chose what I had that blended best, and seriously, there's so little difference in the weight of 60wt and 100wt.
The center turned out just lovely.  I should note that the arched frames are stitched using the medium size double-S template by Ronda Beyer.  This is one of my all-time favorite templates.  I have never used it for cross-hatching, but it makes nice framework.  There are small dots, and they tie in with dots placed in other locations on the quilt.  Each purple block is done the same with a feathered wreath, a small section of pebbles and some echo quilting.
 The embroidered wreaths have curved cross-hatching, and my free-hand, free-form feathers around them.
 One issue I ran into was inadequate backing fabric on the sides of the quilt.  I had only about 2" per side.  As a result, I had to modify my initial design plan for how I was going to quilt the sides.  I ended up stitching more of the free-form feathers in the aqua, and it looks nice and cohesive.
Here's to hoping that my client enjoys this as much as I do!  Have a quilty week~ 
 

Monday, September 09, 2013

Another 60" Feathered Star

This 60" Feathered Star by Judy Neimeyer came off the machine last Friday.  The client (Ann) saw this quilt that I quilted back in the springtime, and wanted a clone of it.  This is Jeanette's quilt and I refuse to make a clone of someone's quilt that is a show quilt.  Somehow, that is just not right in my mind.  I explained it to Ann, and assured her I'd use some of the features she liked about the reference quilt, but would make this quilt different and her own.  It is destined for her husband's office.
 First off, the color scheme is completely different.  Being brown, I had to dig deep to find that creative juice.  My brain just does not think in browns!  Except for the outer border, most threads are not brown.  I used many different threads -- Superior Omni, Glide and Magnifico, with Madiera Monolon for the ditching.  I know that it must be challenging selecting fabrics for these complicated quilts.  I'd struggle too.  I think, however, that the design loses itself somewhat though because of all the star point backgrounds being so close in tone (all beige, except for one set of points).  To help this, I stitched the center point backgrounds with a gold thread - SoFine to be exact.  I wanted to try to get a slight tone to the background.  Not sure it really worked unless you are up close though.  The other backgrounds were shades of tan.
 Every one of these type quilts I quilt, seems to be destined for issues at the center.  The center just puckers.  Always.  I've come to believe it is a feature of the design, or of how the piecer needs to manipulate it (and all the bias edges) in order to get the center point to match.  As a result, I limited the quilting across this center point.  Hopefully, after Ann blocks the quilt, it will lay fine.
 The brown background has a similar quilting to the previous one I did.  I chose a peacock-colored Glide thread to stitch the cross-hatching and feathers.  I wanted to bring out the blue in the feathered points, as well as make the feathered ring more visible.  The background diddle-daddle with pebbles (for lack of real technical name!), is in a deep rust Magnifico.  It just disappears as texture, as desired.

The border is a close cousin to the previous quilt, but I simplified it this time because it was as total pain in the butt to do before, and I don't really know that it brought the bang for the buck either.  For a non-show quilt, this is pretty and functional.
 One feature that Ann requested was the circles.  I have stitched many of them into the design.
The battings she sent were different that what I used before, and I don't think had quite as much poof.  These are QD 70/30 and QD wool.  The 70/30 is a much flatter batt than my Hobbs 80/20.  The many small dots I quilted on the green feathers's background (same size dot), barely show on this quilt, but were very prominent before.  Drat!  Still pretty, but I generally prefer the Hobbs battings.
 Another look at the outer segment...and below at the border at the mid-point.
I hope Ann will love it.  It's a great looking man's quilt, and was fun to finish :-)  Off to UPS!

Thursday, September 05, 2013

My Prodigy

Last weekend I lost my mind.  It was bound to happen, but I thought it would happen when she was older. My daughter turned seven on Monday, and by Saturday, she was running my longarm!
Last month, at the Maine Quilt show, she conned me and her Nana to get her 3 fat quarters.  She'd have bought more if I'd not put my foot down and insisted she just shop at the free stash store!  So a couple weeks ago while her brothers were busy, she and I layed out this lap quilt.  It finishes at about 50"x58".   Last year she started a small doll quilt, and earlier this summer she got it out and finished the hand quilting. Mind you, this has huge stitches, and clearly looks like it was done by a 5-6 yr old.  But she was proud and I was amazed by her attention span to finish the quilting.  When this recent project came to fruition, it quickly grew from a dolly quilt to one for her.  I was pretty sure right off that she wouldn't be hand stitching anything this large just yet.   She doesn't yet use the sewing machine, so I cut and machine pieced this together in an afternoon.  She stuck close by, bringing me pieces, making sure that they were in the right order for the pattern.  I told her that if I had a couple client quilts off the frame by last weekend, then I'd let her try quilting it.  It is always a crapshoot guessing whether I will have the machine free on the weekends or not.  I knew we had 2 days to get 'er done!
I set her up with the easiest pantograph I have - Flutterby.  She liked the butterflies.  She's too short to quilt from the frontside, and it was too tricky doing it with a 12"x12" stool.  If I had a 48" long stool, it would have been feasible.  Another day.  She did a great job manipulating this large machine.  Albeit, many of the butterflies are bumpy and not perfectly shaped, but she does not really care.  I told her I would quilt it for her, OR she could do it and then  she could enter it at MQX if she wanted.  Eye on the prize (have you seen this before??!), she chose to do it.  She chose a nice Aqua YLI polished poly thread, which performed wonderfully...not a thread break whatsoever.
The back is flannel and will be oh-so-snuggly when the cooler weather hits. After it is bound...sigh, add that to my list of to do's.

As for me, I have knocked 4 quilts off my backlog since the kids started school 4 days ago (that many have come back in the door though!).  Working, working, working :-)  I'll have some pics next time!~
(her recent birthday picture)

Sunday, September 01, 2013

A Second Case of Busy & Colorful

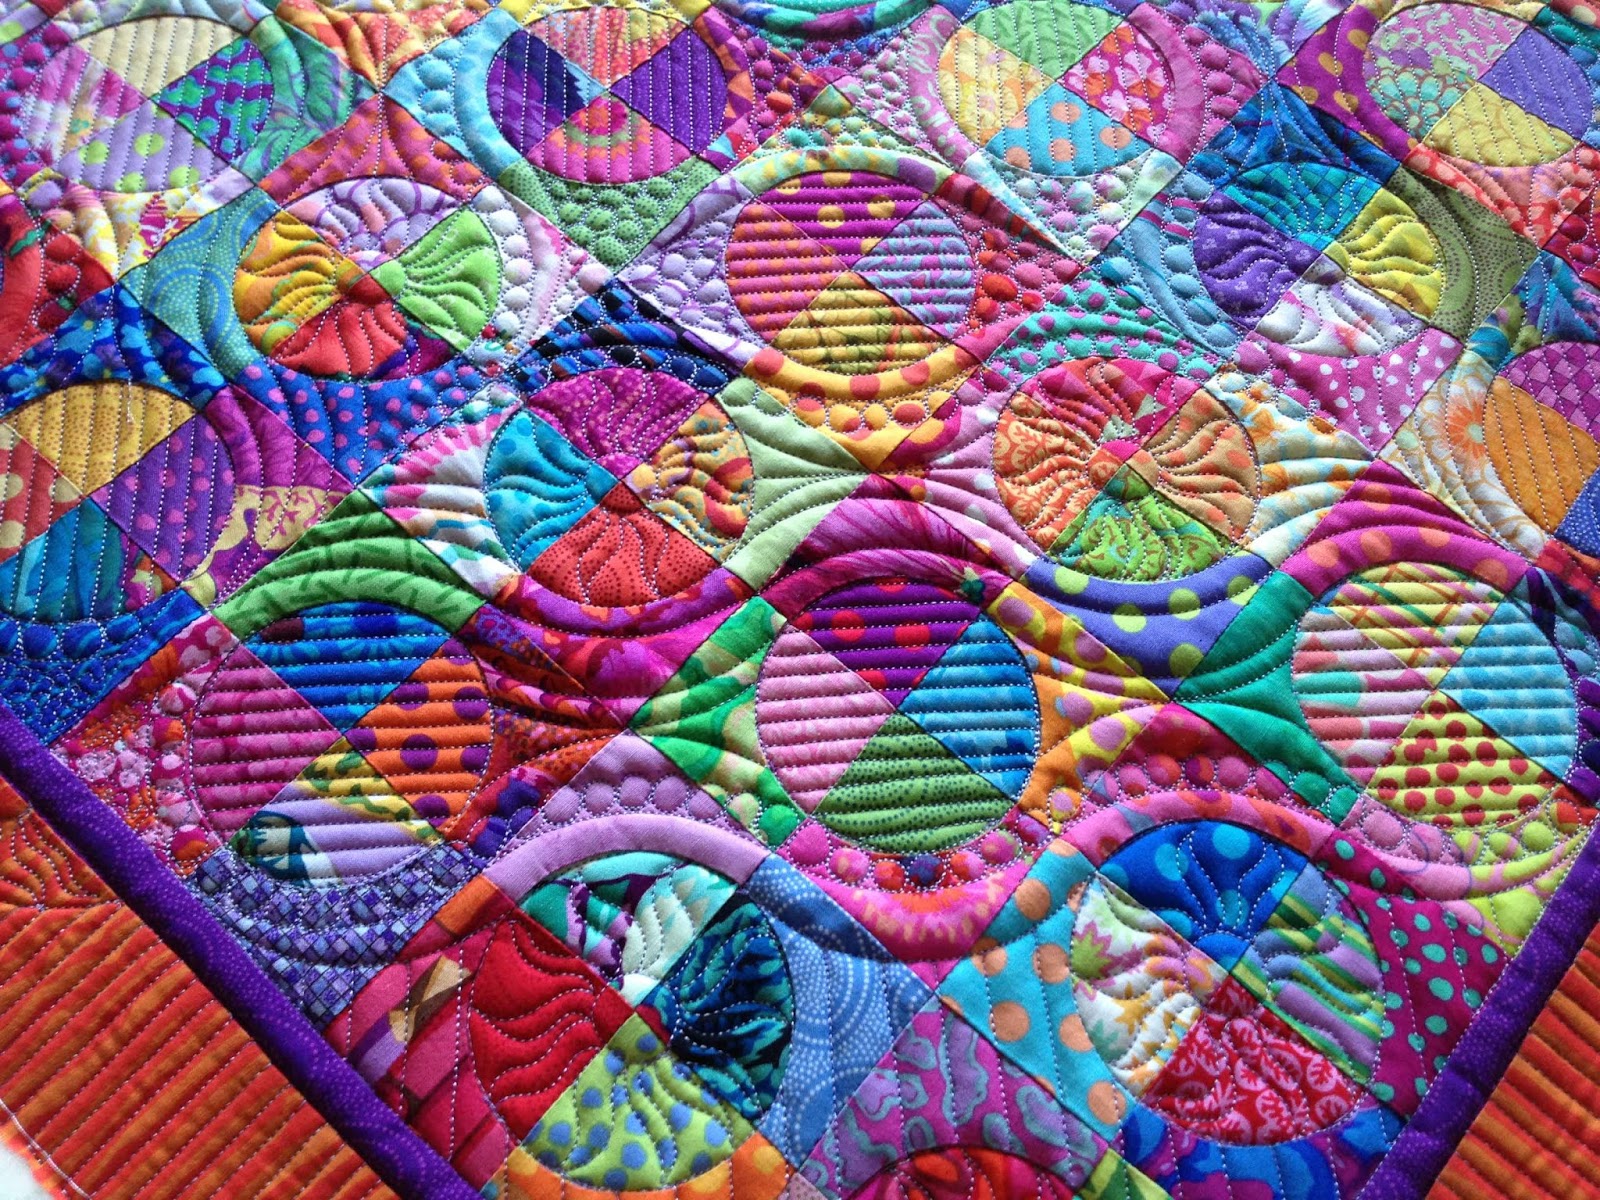
This mini (not really mini, just small) quilt is the 2nd one my client Carol sent me.  I showed her other one done in similar busy and colorful fabrics a week ago.  These are a variety of Kaffe Fassett, Philip Mabry and batiks.  It is without question busy and bold.  She has used the Inklingo to hand stitch them, so the stitching is wonderfully neat.  Overall, it is 38"x48".
I wanted to create a spinning look with this quilt, so every other section of the "pie & tart" was quilted to appear it is spinning.  I avoided traditional feathers on this wild-child, and went with an edgier look.  Straight lines show up on the prints better, so they are used in the alternating "pies" to offset the spinners.
 The background is stitched in a lavender thread in a tight spiral.  It is to reinforce the spinning effect, and to densely stitch the background so as to pop the circles from the background.  A pink thread might have been a more likely choice, since many of the fabrics have fuscia in them, but I didn't have an appropriate bobbin.  I had lavender, and in all honesty, the lavender doesn't show much anyways!  Such is the beauty of prints.
 The smaller circles are stitched with curves and suns.  Something about this quilt seems hot.
 Here's a look at the back.  It too is a busy Kaffe print.  The border design is more evident from the back. Stitched in blue thread, it is concentric circles, like the semi-circles on the inner part of the quilt.
Stats...
batting: Hobbs 80/20 covered with Tuscany wool
thread: Glide and Magnifico on top with Bottomline bobbins
time: about 6-1/2 hours

Tuesday, August 27, 2013

Studio

I see pictures of many quilter's studios, and drool.  They are in pretty rooms, with good light, heat, windows, rugs, and appropriate cabinets and things for storage, etc.  Mine?...nope.  I was lucky to get access to the basement 4 years ago.  My kids would have much preferred having it as a play space.  Gradually, I have taken more and more of it, claiming it as my own, and little by little, the area is getting neater and neater.  I'll never have windows or heat -- but in all seriousness it doesn't get that cold even in the dead of winter.

I could only find a couple of "before" pictures, and these were taken about a year ago.  You can see in the first one where I was priming the walls for painting them.  The battleship gray concrete was so dank and dismal looking.   I was doing what I could to increase the brightness, to make it more like a work room and less like a concrete cell.
I don't mind the pre-school foam mats on the floor.  They keep it warmer, and soft under foot.  It might be nicer if they were all one color, but the only way they come like that is if they are all brown or all gray.  No thanks. Crayola colors, here I come.  The shot below shows how my thread was stored...these June Tailor thread cone racks, strung together with carabeaners and hung with chains.  Kinda tacky, agreed, but the function was there.  I'm telling you, the concrete walls limit everything.  It is very hard to get anything attached to concrete.  There's my old (small) sewing machine, on the wooden table, with a desk we no longer have next to it for extra space.  I also had another 30"x6' table behind these where the cutting mat lived.  It was not enough storage or work space and honestly, it looked hideous.  It was a mis-match of epic proportions.  Fortunately, an ugly studio didn't limit my ability to quilt beautiful quilts.

Last winter, I painted the walls bright yellow, and got matching yellow sheers to cover all of our personal storage areas.  I just wanted to see my space.  I'm by no means a fan of yellow, if fact, I loathe yellow.  Don't wear it, don't sew with it, and definitely don't paint the walls upstairs yellow.  But here it was for reflecting the light.

Flash forward a year or so.  This panorama which may be hard to view shows where I am now.  There are subtle improvements, not the least of which are less clutter, and more space.
 My husband made one half-joking comment about my ribbon collection last year (which was hanging from a 24" mini-quit in our bedroom) - he kidded that the wall was going to come down with the ribbons soon.  I liked having them upstairs because it reminded me of where I have come in 4 years (then 3 yrs).  I promptly moved them down to the studio that was under renovation.  This year I had to add a 2nd row.  The ones on the bottom are from this season.  Soon I won't see the bright yellow walls.
 The machine hasn't moved, and you can see the yellow curtains hiding our family stored stuff on the far left.  My thread is now hung on the wall.  There are rolls of batting stored to the far left (and one is on the bar under the machine).  Every inch of this place (all 900 square feet) has function.
This is such a drastic improvement over the previous crappy system, which knocked off cones if you inadvertently bumped the racks!  But, I kid you not, it took my husband 6-8 hours to predrill the holes in the concrete wall for those 4 furring strips!  I don't have the heart to tell him I need 2 more racks (and they can't go higher or I can't reach them!).
 My new machine that I won at MQX East sits here now.  It's like seeing a full size cruise ship by the smaller yacht variety.  I have also acquired a couple of new tables.
 Unfortunately (or fortunately) one of them was a very economical deal that my husband got from his office, which they sold off really cheap, but it was shorter than what I ultimately wanted.  My mom heard this, and got me the black one on the far left, which is fine for storage, but too wobbly to cut on, and just doesn't match the rest of the tables.  Life, I guess.  And the chair, which is ugly, has never bothered me in the least.  I moved my cutting mat to just left of the sewing machine because I was doing some paper piecing.  I plan to make a small ironing surface to use there too, someday.  I still plan to get a 30"x60" cutting mat, but other areas of life have taken precedence.
A couple weeks ago, I drafted plans and bought the lumber for my husband to make me an ironing table.  I even had Lowe's cut the plywood to the right sizes to save him time.  I found the canvas at Mardens for a whopping $2 per yard, or I might have searched for something more matchy for my studio.  Last weekend, he was persuaded to make the table for me.  It will eventually get a shelf on that lower area, but I haven't sanded the wood yet.
 Nobody likes or needs to iron quilts on a conventional ironing board.  It is constantly on the floor, and that pointy end was only designed with clothing in mind.  Ours may never get used again...I got out the power stapler and 2 layers of batting, and whipped up the top in about an hour.
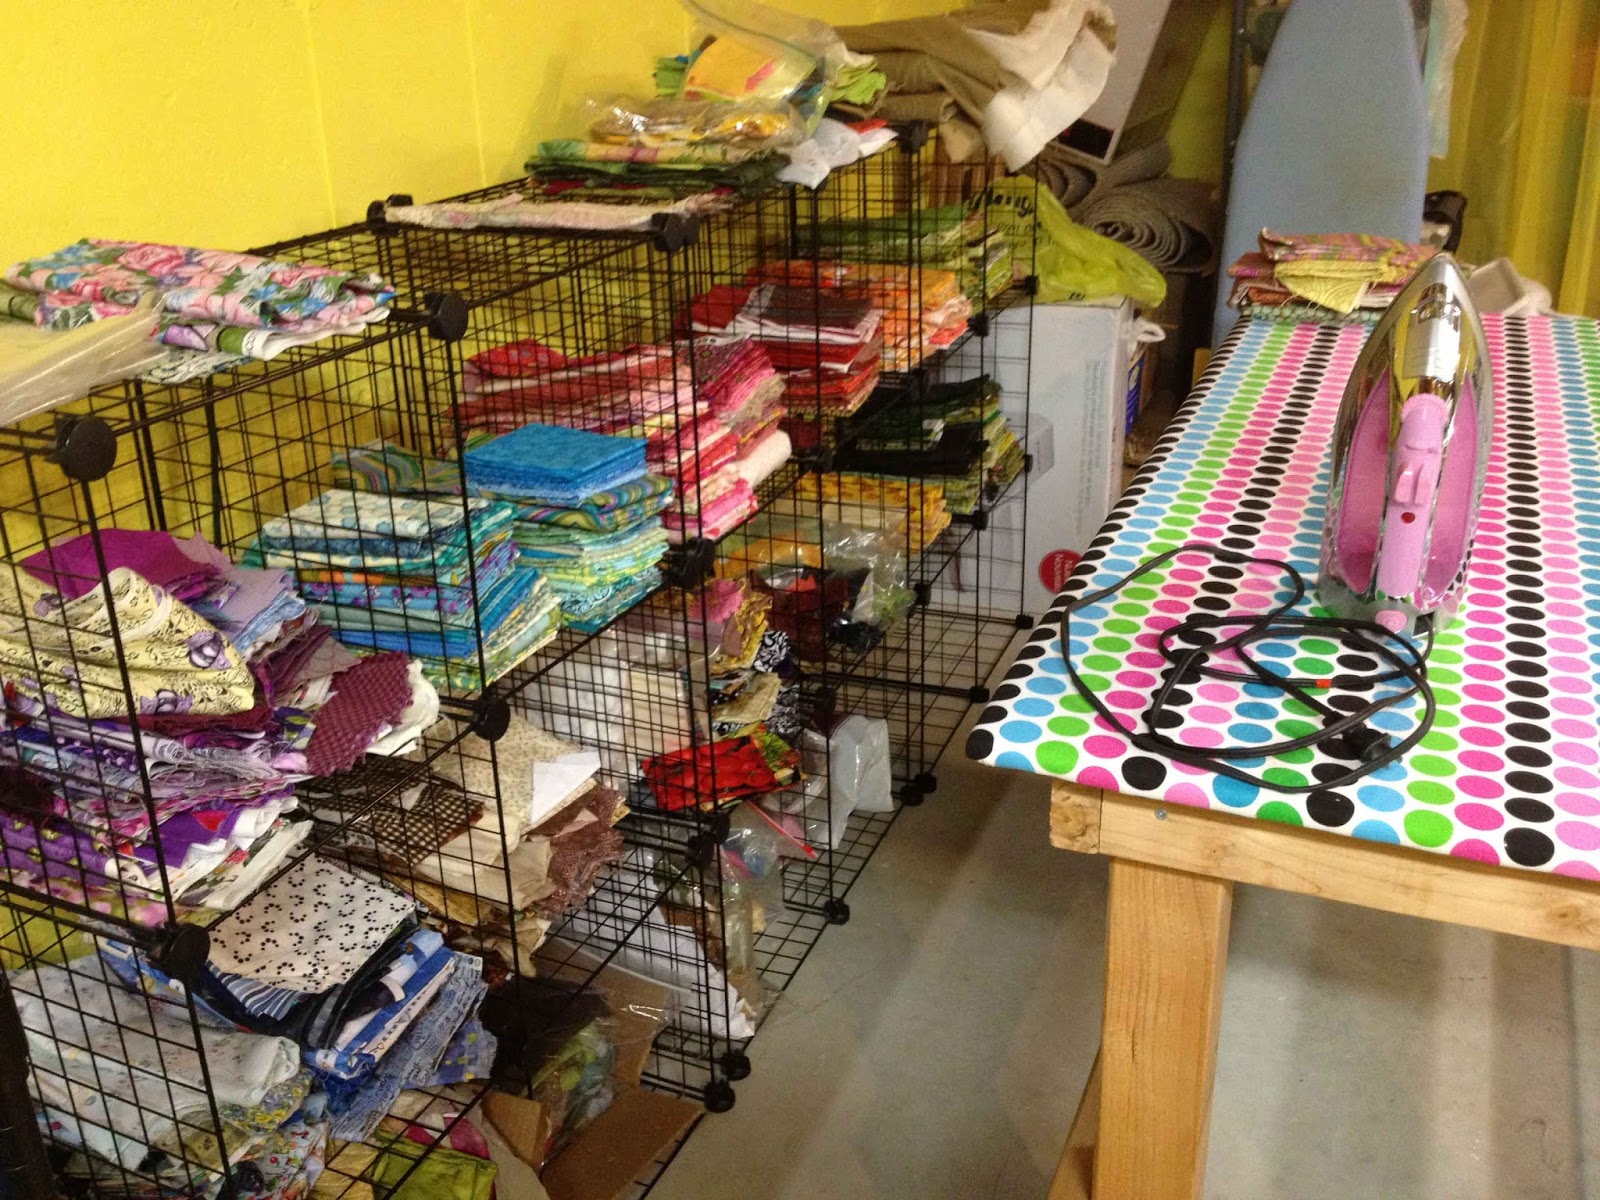
 My fabric shelves are still being organized.  I let them go totally messy so it is taking a while.  I got another rack this past week too so that they are not overloaded, and I can keep better organization.
All of my small scraps are in the little tubs that are on this (above) shelf).  I used to use the scraps quite a bit, and wonder how much they will be used.  Sometimes it is hard to part with fabrics that you like.   The unit of drawers on the top of the shelf is also new.  It arrived yesterday.  It is really for storing screws and hardware, but I am using it for bobbins.  Perfect! Gone is the cardboard box that held 30 bags of bobbins, which made finding the right color a challenge.

One area I still lack is a design wall.  Right now, a quilt I am pondering lays on the floor in pieces.  I need to investigate hot-gluing a flannel-backed table cloth onto the concrete wall.  My competition quilts are all layed out on the insulation board that I block on.  Within a couple days the last of these will be on their way to the September shows.
Lastly, I will leave you with a little banner I quilted nearly 4 years ago.  It was printed by Spoonflower onto a fat quarter.  It's just pinned onto the sheers.
 Perfect studio?...Not even close.  Furniture doesn't match, it has one casement window, one overhead light that has died (to be replaced this weekend!), but it is mine and slowly but surely it is becoming more organized and functional.


Sunday, August 25, 2013

Busy Quilt?...Never Fear!

My client Carol has sent me 4 quilts now, that she wants full custom quilting on.  One is headed for a show next month, so I have only posted a few sneak peeks.  In a month, I will show more.  This one is 29" square (yup, pretty small).  It is made from Kaffe Fassett, Phillip Mabry, and other similar busy modern prints, along with some batiks for added color.  She's pieced all of the drunkard's path blocks by hand in a way that I have never yet seen a quilter do so well.  When clients say that their quilt is hand-pieced, it sometimes raises my eyebrow, but not her's.  They're beautiful.  They lay flat, every seam where it belongs, etc.  This one isn't even blocked yet, but it lays near-perfect.
If's frequently a challenge when a quilt comes in that does not have space for me to do decorative quilting. To compound that, this quilt doesn't have a visible focal point within the piecing either.  It is a repetitive pattern in very busy print.  My job's difficulty is escalated!  I tried to rise to the occasion. 
I used a combination of curvy borders and dense fillers to define an on-point frame. There is another one done at the center of the quilt, which defines the center for the viewer's eye.  When I first saw this quilt, I though it reminded me of the tropical sunshine.   Carol is from Panama (the one in central America, not Florida!) so she knows about sunshine.  For that reason, I quilted suns in some of the circles.  It keeps the quilting fun and light-hearted.  Other areas of the quilting are extremely structured, so the suns are a nice juxtaposition.   
 Use of 1/4" parallel lines and rows of pebbling help to pop the waving lines I used as frames.  To make these waves more pronounced, they are doubled and trippled in some cases.  I love the effect.
The outer border is a stripe, but not a regular stripe.  I was hesitant to do the parallel lines, but decided to do it anyways because I felt they'd tie into the lines I'd used elsewhere better than anything else.  At the center of each border, I placed another sun.  It helps to tie the border into the quilting of the body of the quilt.
 Curious minds?...
The quilt is double batted: Hobbs 80/20 with Tuscany wool over that.
I used a lavender Glide thread on the top and Superior Bottomline in the bobbin.  Why lavender? Well, it's almost a crapshoot with these very playful and colorful quilts which color thread really works best.  In the end, I chose a thread that blended well on all of the fabrics.  I could have gone with an orange on the outer border, but opted to keep the thread color consistent (and added orange bobbins to the list of my Superior order!...pst...I didn't have a bobbin color I preferred either!).

This fun little mini looks phenomenal and I hope she loves it as much as I do.  I just took her other quilt off the frame today and will show it to you later this week.  It's another wildly fun piece.